DIY Painting Techniques to Transform a Room
When it comes to refreshing the look of a room, utilizing DIY painting techniques can be a game-changer. One of the simplest yet effective ways to transform a space is by incorporating an accent wall. Choose a bold and vibrant color that complements the existing decor to add a pop of personality to the room. Whether it’s the wall behind the bed in the bedroom or the one facing the couch in the living room, an accent wall can instantly elevate the overall ambiance.
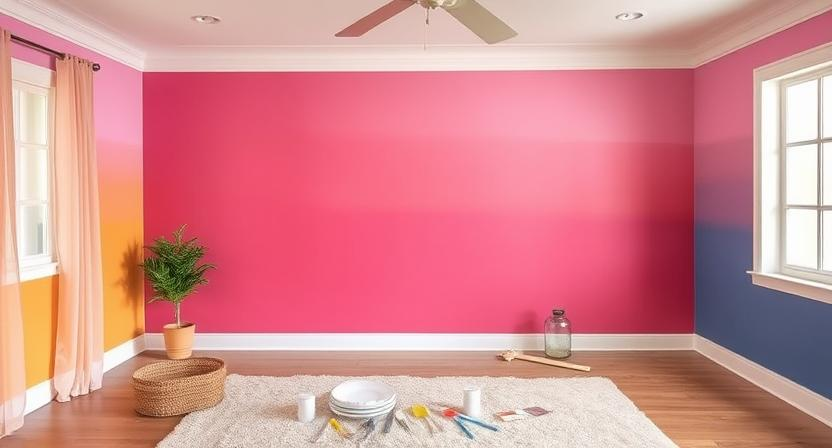
Another way to revamp a room through paint is by embracing the ombre effect. This gradual blending of one color hue to another can create a soothing and cohesive atmosphere. Start by selecting a base color and gradually mix in varying amounts of white or another lighter shade to achieve the desired ombre effect. Apply the colors in vertical or horizontal stripes and blend them seamlessly for a sophisticated and contemporary look.
• Experiment with different painting techniques such as sponge painting or stenciling to add texture and depth to the walls
• Consider using metallic paints or glazes for a touch of elegance and glamour in the room
• Create a statement ceiling by painting it a different color than the walls, or adding a decorative pattern for visual interest
• Don’t be afraid to mix and match colors to create a unique and personalized look that reflects your style and personality
Creative Wall Art Ideas for a Personal Touch
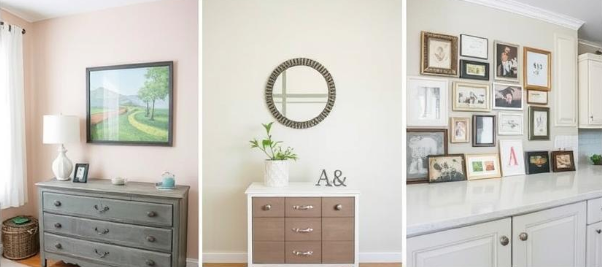
When looking to add a personal touch to your space, consider creating your own custom wall art. This can be as simple as framing meaningful quotes, sketches, or photographs that resonate with you. Another idea is to get creative with a blank canvas and let your imagination flow with paint, textures, and colors to reflect your style and personality.
If you’re feeling adventurous, try incorporating some DIY techniques like stenciling, hand lettering, or even collage to design unique artwork for your walls. Remember that the goal is to infuse your living space with pieces that speak to you and make you feel at home. By exploring your artistic side, you can showcase your individuality through the personalized wall art that adorns your home.
• Framing meaningful quotes, sketches, or photographs
• Getting creative with a blank canvas using paint, textures, and colors
• Incorporating DIY techniques like stenciling, hand lettering, or collage
• Infusing your living space with pieces that speak to you and make you feel at home
• Showcasing your individuality through personalized wall art
Upcycling Furniture for a Fresh Look
Revamping old furniture pieces through upcycling is a fantastic way to breathe new life into your space without breaking the bank. Whether it’s an outdated dresser, a worn-out coffee table, or a tired chair, a fresh coat of paint, some new hardware, and a bit of creativity can transform these items into stylish and unique pieces that perfectly fit your decor aesthetic. By upcycling furniture, you not only save money but also contribute to sustainable living by repurposing items that might have otherwise ended up in the landfill.
When upcycling furniture, think outside the box and consider unconventional methods to give your pieces a fresh look. Experiment with different paint colors, textures, and finishes to create a one-of-a-kind piece that reflects your personality and style. Don’t be afraid to mix and match different elements to add character and charm to your furniture. With a little effort and imagination, upcycling furniture can be a fun and rewarding project that adds a touch of creativity and individuality to your home decor.
• When upcycling furniture, consider the following tips:
– Sanding and repainting old wooden pieces can give them a modern look
– Adding new hardware such as drawer pulls or knobs can instantly update the piece
– Upholstering old chairs or sofas with new fabric can completely transform their appearance
• Look for inspiration online or in magazines to get ideas for your upcycling projects
• Don’t be afraid to try out different techniques and materials to achieve the desired look
• Remember that upcycling is not only cost-effective but also environmentally friendly
Installing a Statement Light Fixture
A statement light fixture can instantly elevate the atmosphere of a room, becoming a focal point that enhances the overall aesthetic. When installing a statement light fixture, consider the height at which it should be hung to ensure proper illumination and visual impact. Additionally, choose a fixture that complements the existing decor while making a bold statement on its own.
The selection of the right statement light fixture can transform a mundane space into a luxurious haven. Whether opting for a dramatic chandelier or a contemporary pendant light, the key is to find a piece that not only illuminates the room effectively but also adds character and style. With the right installation and fixture choice, a statement light fixture can truly elevate the ambiance of any room in your home.
• When installing a statement light fixture, consider the height at which it should be hung for proper illumination and visual impact.
• Choose a fixture that complements the existing decor while making a bold statement on its own.
• The right statement light fixture can transform a mundane space into a luxurious haven.
• Whether opting for a dramatic chandelier or contemporary pendant light, find a piece that illuminates effectively and adds character and style.
• With the right installation and fixture choice, a statement light fixture can truly elevate the ambiance of any room in your home.
Creating a Custom Gallery Wall
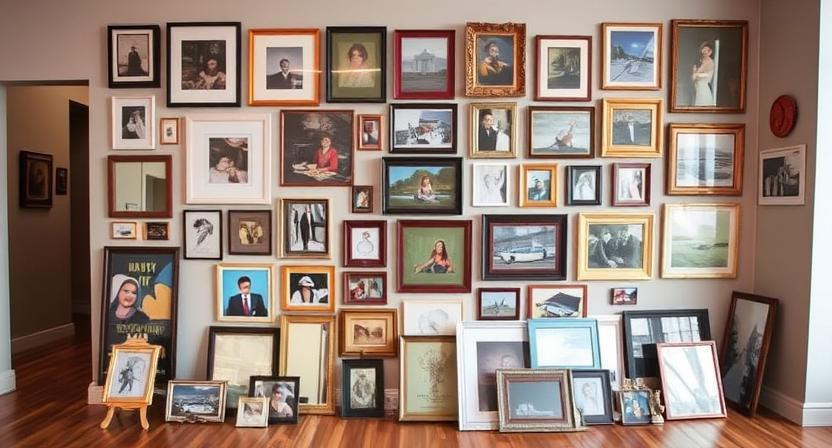
Gallery walls are a popular way to showcase a collection of artwork, photographs, or prints in a visually appealing arrangement. When creating a custom gallery wall, it’s essential to start by gathering all the pieces you want to display. This could include various-sized frames, canvases, mirrors, or other decorative items that complement each other in style and color.
Before hanging anything on the wall, lay out your collection on the floor to experiment with different arrangements. Play around with the placement of each piece until you find a layout that is pleasing to the eye. Be sure to consider the spacing between each item to create a balanced look. Once you are satisfied with the arrangement, take a photo to use as a reference when it’s time to transfer the layout onto the wall.
• Start by gathering all the pieces you want to display
• Experiment with different arrangements on the floor before hanging anything
• Consider spacing between each item for a balanced look
• Take a photo of the layout for reference when transferring it onto the wall.
Revamping Cabinet Hardware for a Modern Update
When looking to give your kitchen or bathroom a modern update without breaking the bank, consider revamping your cabinet hardware. Swapping out old, dated knobs and handles for sleek, contemporary ones can instantly elevate the look of the space. Opt for finishes like brushed nickel, matte black, or brass to achieve a stylish and modern aesthetic that complements your cabinetry.
To begin the process, first, remove the existing hardware using a screwdriver. Ensure to keep track of the placement of each piece to make installation of the new hardware easier. Once removed, clean the cabinets and drawers to prep them for the new hardware. Then, simply attach the new knobs or handles using the provided screws. Step back and admire how this simple update can make a significant difference in the overall look and feel of your space.
• Consider finishes like brushed nickel, matte black, or brass
• Swapping out old knobs and handles for sleek, contemporary ones can elevate the look
• Keep track of placement of existing hardware for easier installation
• Clean cabinets and drawers before attaching new hardware
• Admire how a simple update can make a significant difference in the space
DIY Shelving Solutions for Organization
Transforming a cluttered space into a well-organized area can be achieved with the help of DIY shelving solutions. Whether you need to declutter your living room, bedroom, or home office, adding shelves is a practical and stylish way to keep things in order. From floating shelves to bookcase units, there are various options to choose from based on your space and storage needs.
To create your DIY shelving unit, start by measuring the space where you plan to install the shelves. Next, gather your materials, which could include wood planks, brackets, screws, and a level for accuracy. Depending on your skill level, you can opt for simple straight shelves or get creative with geometric shapes for a more modern look. Once your shelves are installed, take the opportunity to arrange your items in an organized manner, utilizing baskets or bins for smaller items to maintain a clutter-free environment.
• Measure the space for shelving installation
• Gather materials such as wood planks, brackets, screws, and level
• Choose between simple straight shelves or creative geometric shapes
• Arrange items in an organized manner after installation
• Utilize baskets or bins for smaller items
Refinishing Hardwood Floors for a Luxe Finish
Refinishing hardwood floors is a transformative process that can breathe new life into a space. A luxe finish adds a touch of elegance and sophistication to any room, making it a worthwhile investment for those looking to elevate their home decor. By sanding down the existing finish, repairing any damages, and applying a fresh coat of stain and sealant, hardwood floors can be restored to their original beauty or even given a modern twist with a new color or finish.
The key to achieving a luxe finish when refinishing hardwood floors lies in meticulous preparation and attention to detail. Properly cleaning and sanding the floors ensures a smooth surface for the new finish to adhere to, while selecting a high-quality stain and sealant will enhance the natural beauty of the wood. Investing time and effort into refinishing hardwood floors can result in a stunning transformation that will not only enhance the aesthetics of a room but also increase the overall value of the home.
• Properly clean and sand the floors to ensure a smooth surface
• Select high-quality stain and sealant for enhancing natural beauty of wood
• Invest time and effort into refinishing for stunning transformation
• Increase overall value of home with beautifully refinished hardwood floors
Adding Decorative Molding for Architectural Interest
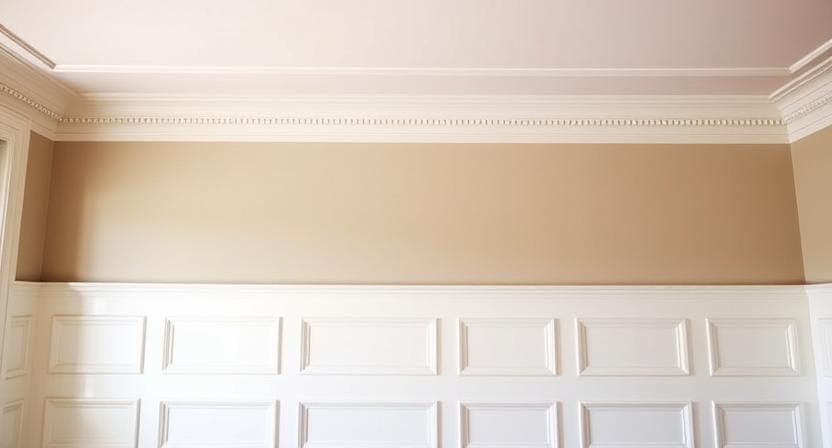
Decorative molding is a simple yet effective way to add architectural interest and character to any room in your home. Whether you prefer a classic crown molding for a more traditional look or a sleek, modern trim for a contemporary touch, the options are endless. Installing molding can elevate the overall aesthetic of a space, giving it a refined and polished appearance.
When selecting molding for your space, consider the style and era of your home to ensure a cohesive look. You can choose from various profiles and sizes to match your existing decor or create a contrasting focal point. The installation process is relatively straightforward, making it a DIY-friendly project that can upgrade the visual appeal of your room in no time.
• Crown molding can add a touch of elegance and sophistication to any room
• Baseboard molding can create a seamless transition between the floor and wall
• Chair rail molding can protect walls from damage while adding visual interest
• Picture frame molding can showcase artwork or photos in a unique way
Updating Window Treatments for a Stylish Look
When looking to give your space a stylish makeover, don’t overlook the impact that updating your window treatments can have on the overall ambiance of a room. Whether you prefer the clean lines of modern blinds or the elegance of flowing curtains, selecting the right window coverings can truly elevate the aesthetic of your home. Consider opting for light-filtering options to allow natural light to brighten up your space, or go for blackout curtains for privacy and to create a cozy atmosphere in bedrooms or media rooms.
In addition to choosing the right type of window treatments, pay attention to details like hardware and tie-backs to add a touch of sophistication to your windows. Opting for sleek and modern curtain rods can complement contemporary decor, while decorative finials or holdbacks can add a touch of glamour to a more traditional space. Don’t shy away from mixing and matching different elements to create a unique and personalized look that ties the room together seamlessly.
• When updating your window treatments, consider the following options:
– Light-filtering blinds or curtains for a bright and airy feel
– Blackout curtains for privacy and a cozy atmosphere
• Pay attention to details like hardware and tie-backs to enhance the overall look of your windows.
– Choose sleek curtain rods for a modern touch
– Add decorative finials or holdbacks for a touch of glamour
• Mix and match different elements to create a unique and personalized look that complements your space.
Building a Custom Headboard for a Cozy Bedroom
When looking to add a personalized touch to your bedroom, creating a custom headboard can be a fun and rewarding project. By choosing materials that complement your decor style, such as reclaimed wood for a rustic look or velvet upholstery for a touch of luxury, you can achieve a unique focal point for your bedroom. Customizing the size and shape of the headboard to fit your bed frame adds a sense of cohesion to the room, making it feel more inviting and cozy.
To start this DIY project, gather your materials, which may include wood, upholstery foam, fabric, screws, and a staple gun. Measure the dimensions of your bed to determine the appropriate size for the headboard. Whether you opt for a simple rectangular design or a more elaborate shape like a scalloped edge or a tufted pattern, make sure to secure the headboard firmly to the wall or bed frame for safety. Adding embellishments like decorative nail heads or tufting buttons can elevate the overall look and tie in with other elements in your bedroom decor.
• Gather materials such as wood, upholstery foam, fabric, screws, and a staple gun
• Measure dimensions of your bed to determine appropriate headboard size
• Choose materials that complement your decor style (reclaimed wood for rustic look or velvet upholstery for luxury)
• Customize the shape of the headboard to fit your bed frame for cohesion
• Secure headboard firmly to wall or bed frame for safety
• Add embellishments like decorative nail heads or tufting buttons for an elevated look
Repurposing Old Items into Stylish Decor Pieces
When looking to spruce up your home decor on a budget, consider repurposing old items into stylish decor pieces. By breathing new life into discarded or forgotten objects, you can add unique character and charm to your living space. Old wooden crates can be turned into rustic shelving units, vintage suitcases can be stacked to create a trendy side table, and antique frames can be repurposed as quirky trays for candles or trinkets.
The beauty of repurposing old items lies in the endless creative possibilities it offers. A worn-out ladder can be transformed into a chic plant stand, old window shutters can be repurposed as decorative wall art, and vintage tins can be used as eclectic plant pots. By thinking outside the box and giving a second life to items that might have otherwise ended up in the landfill, you not only create a more sustainable home but also add a personal touch to your decor that can’t be replicated with store-bought pieces.
• Old wooden crates can be turned into rustic shelving units
• Vintage suitcases can be stacked to create a trendy side table
• Antique frames can be repurposed as quirky trays for candles or trinkets
The beauty of repurposing old items lies in the endless creative possibilities it offers. A worn-out ladder can be transformed into a chic plant stand, old window shutters can be repurposed as decorative wall art, and vintage tins can be used as eclectic plant pots. By thinking outside the box and giving a second life to items that might have otherwise ended up in the landfill, you not only create a more sustainable home but also add a personal touch to your decor that can’t be replicated with store-bought pieces.
Installing a Peel-and-Stick Backsplash for a Quick Kitchen Upgrade
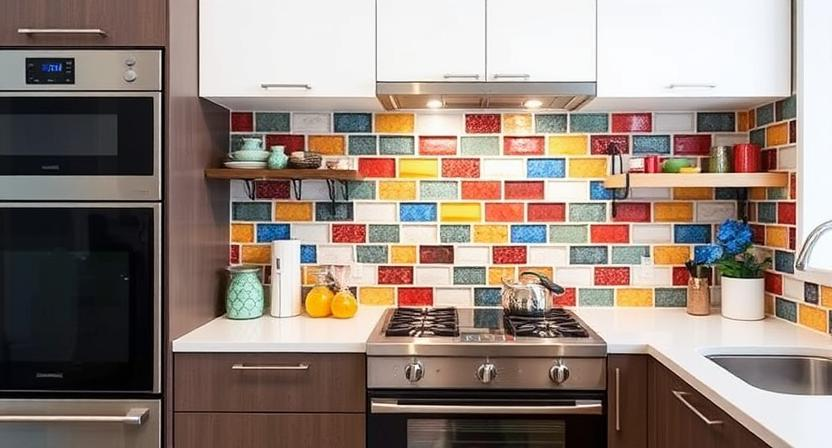
A peel-and-stick backsplash is a fantastic option for those looking to update their kitchen quickly and with minimal mess. These easy-to-install tiles come in a variety of colors, patterns, and styles, allowing you to personalize your kitchen to your taste easily. With a peel-and-stick backsplash, you can transform the look of your kitchen without the need for professional help or extensive renovation work.
To install a peel-and-stick backsplash, start by thoroughly cleaning the area where you will be applying the tiles. Make sure the surface is smooth and free of any dirt or grease to ensure the adhesive sticks properly. Next, measure and cut the tiles to fit the space, removing the backing and pressing them firmly onto the wall. Once all the tiles are in place, use a tile roller to ensure they are securely attached. This cost-effective and time-saving solution will give your kitchen a fresh and modern look in no time.
• Thoroughly clean the area where you will be applying the tiles
• Make sure the surface is smooth and free of any dirt or grease
• Measure and cut the tiles to fit the space
• Remove the backing and press them firmly onto the wall
• Use a tile roller to ensure they are securely attached
Installing a peel-and-stick backsplash is a great DIY project for those looking to update their kitchen without breaking the bank. These tiles are easy to work with and can make a big impact on the overall look of your kitchen. Whether you prefer a sleek, modern design or something more traditional, there are peel-and-stick backsplash options available to suit your style. With just a few simple steps, you can give your kitchen a fresh new look in no time at all.
Peel-and-stick backsplashes are also perfect for renters who want to add some personality to their space without making permanent changes. Since these tiles can be easily removed without damaging the wall underneath, they are an ideal solution for those living in apartments or rental homes. Plus, if you ever decide to change up your kitchen’s design in the future, simply peel off the old backsplash and replace it with something new – it’s that easy!
Creating a Stylish Entryway with DIY Projects
When it comes to making a lasting impression in your home, the entryway sets the tone for what’s to come. By incorporating some creative and budget-friendly DIY projects, you can transform your entryway into a stylish and welcoming space. Start by adding a statement mirror or artwork to create visual interest and reflect light, making the area feel more spacious. Consider repurposing an old console table with a fresh coat of paint or applying decorative wallpaper to add a personal touch to the space.
Another way to elevate your entryway is by installing wall hooks or a chic coat rack for easy organization of coats, bags, and accessories. This not only adds functionality but also brings a sense of order to the space. Don’t be afraid to get creative with your DIY projects in the entryway – whether it’s crafting a custom key holder or making a decorative storage bench, the possibilities are endless to make your entryway both practical and stylish.
• Add a statement mirror or artwork for visual interest and light reflection
• Repurpose an old console table with a fresh coat of paint
• Apply decorative wallpaper for a personal touch
• Install wall hooks or chic coat rack for organization
• Get creative with DIY projects such as custom key holder or decorative storage bench
Makingover Bathroom Vanity with Paint and Hardware
When looking to update your bathroom vanity, consider the transformative power of a fresh coat of paint and new hardware. Painting your vanity in a bold color can add a modern touch to the space or opting for a neutral tone can create a calming atmosphere. By simply changing the hardware to sleek, modern handles or vintage knobs, you can instantly elevate the look of your vanity and give it a whole new feel.
The process of updating your bathroom vanity with paint and hardware is a budget-friendly way to refresh the space without a complete renovation. Whether you choose to go for a trendy matte black finish or a classic white color, the key is to ensure proper prep work such as sanding and priming before applying the paint. Swapping out the current hardware with new pieces that complement the overall aesthetic of your bathroom can tie the whole look together and make a significant impact on the overall design.
• Painting your vanity in a bold color can add a modern touch to the space
• Opting for a neutral tone can create a calming atmosphere
• Changing the hardware to sleek, modern handles or vintage knobs can instantly elevate the look of your vanity
• Updating your bathroom vanity with paint and hardware is budget-friendly
• Proper prep work such as sanding and priming before applying paint is crucial
• Swapping out current hardware with new pieces that complement the overall aesthetic can make a significant impact on the design
Building a Custom Closet Organizer
When it comes to maximizing space and organization in your closet, a custom closet organizer can make a world of difference. By tailoring the shelves, drawers, and hanging rods to your specific needs and wardrobe, you can create a functional and visually appealing storage solution that suits your lifestyle.
Custom closet organizers can be designed to accommodate your clothing items, shoes, accessories, and even specialized storage needs like jewelry trays or tie racks. With thoughtful planning and proper measurements, you can ensure that every inch of your closet is utilized efficiently and that finding and storing items becomes a breeze.
– Custom closet organizers can be tailored to fit your specific needs and wardrobe
– They can accommodate clothing items, shoes, accessories, and specialized storage needs
– Proper planning and measurements are essential for efficient utilization of space in the closet
Updating Outdoor Spaces with DIY Furniture
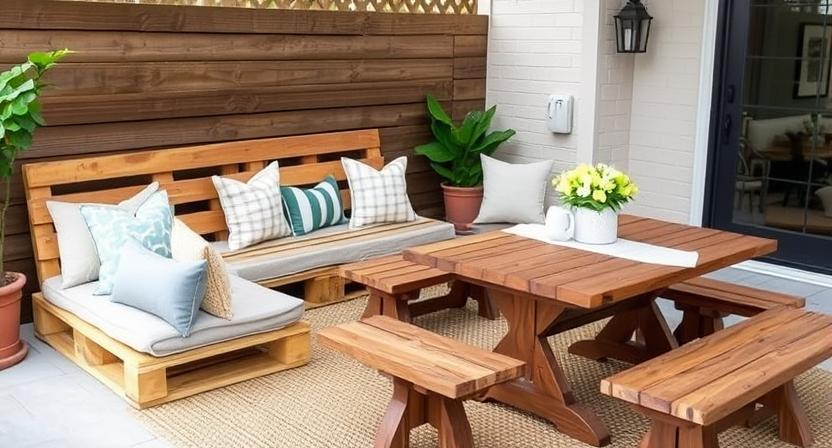
Transforming your outdoor space into a cozy retreat can be achieved with the right DIY furniture projects. From creating a rustic wooden bench to crafting a chic outdoor dining table, the possibilities are endless. Utilizing recycled materials or repurposing old furniture can add a unique touch to your outdoor decor while also being eco-friendly.
One popular DIY furniture project for outdoor spaces is building a comfortable and durable pallet sofa. With some basic tools and a few pallets, you can construct a stylish seating area perfect for lounging or entertaining guests. Adding some cozy cushions and throw pillows can elevate the look and create a cozy ambiance in your outdoor oasis. Dive into these creative projects and watch your outdoor space transform into a welcoming and stylish haven for relaxation and enjoyment.
• Building a rustic wooden bench can add charm to your outdoor space
• Crafting an outdoor dining table using recycled materials is both eco-friendly and stylish
• Repurposing old furniture into new pieces can give your outdoor decor a unique touch
• Constructing a pallet sofa with basic tools can create a comfortable seating area for lounging or entertaining guests
• Adding cozy cushions and throw pillows can elevate the look of your DIY furniture projects
Creating a Cozy Reading Nook with DIY Cushions
Whether you’re an avid reader or just enjoy a quiet corner to relax, creating a cozy reading nook can enhance your space. Adding DIY cushions is a simple yet effective way to make this area inviting and comfortable. Choose soft fabrics and plush filling to ensure your cushions are not only aesthetically pleasing but also cozy to sit on for extended periods.
When selecting fabrics for your DIY cushions, opt for materials that are durable and easy to clean. Consider mixing and matching different patterns and textures to add visual interest to your reading nook. Additionally, incorporating a variety of cushion sizes and shapes can create a layered and cozy look. Don’t forget to personalize your cushions with embellishments like buttons or tassels for a touch of charm that reflects your style.
• Select soft fabrics and plush filling for cozy cushions
• Mix and match different patterns and textures for visual interest
• Incorporate a variety of cushion sizes and shapes for a layered look
• Personalize cushions with embellishments like buttons or tassels
Revamping Kitchen Cabinets with Paint and New Hardware
Revamping kitchen cabinets with a fresh coat of paint and new hardware can instantly breathe new life into a tired space. Choosing a color that complements the existing decor or creates a bold focal point can completely transform the look and feel of the kitchen. Additionally, updating the hardware with modern handles or knobs can give cabinets a sleek and contemporary touch, making them appear more stylish and up-to-date.
When repainting kitchen cabinets, it’s important to properly prep the surfaces by cleaning, sanding, and priming them to ensure the paint adheres well and provides a smooth finish. Opting for high-quality paint specifically designed for cabinets can help achieve a durable and professional-looking result. Swapping out the old hardware for new ones can be a simple yet impactful change that elevates the overall aesthetic of the kitchen and ties the space together cohesively.
• Choosing a color that complements existing decor or creates a bold focal point
• Updating hardware with modern handles or knobs for a sleek touch
• Properly prepping surfaces by cleaning, sanding, and priming before painting
• Using high-quality paint designed for cabinets for durability and professional finish
• Swapping out old hardware for new ones to elevate the overall aesthetic of the kitchen
Adding a Pop of Color with DIY Accent Walls
Adding a pop of color with DIY accent walls is a fantastic way to infuse personality and style into any room. Whether you opt for a bold hue to create a focal point or a subtle shade to complement the existing decor, accent walls have the power to transform a space effortlessly. With just a few basic tools and some paint, you can easily elevate the aesthetics of your home while showcasing your creativity.
When selecting a color for your DIY accent wall, consider the overall ambiance you wish to create in the room. Warm tones like terracotta or mustard can impart a cozy and inviting feel, perfect for living rooms or bedrooms. On the other hand, cool shades such as teal or lavender can evoke a sense of calm and tranquility, ideal for a home office or reading nook. Experimenting with different color palettes allows you to tailor the atmosphere of each room according to your preferences, making DIY accent walls a versatile and impactful design choice.
• When selecting a color for your DIY accent wall, consider the overall ambiance you wish to create in the room.
• Warm tones like terracotta or mustard can impart a cozy and inviting feel, perfect for living rooms or bedrooms.
• Cool shades such as teal or lavender can evoke a sense of calm and tranquility, ideal for a home office or reading nook.
• Experimenting with different color palettes allows you to tailor the atmosphere of each room according to your preferences.